Push and Scan an Image from the Registry
Download Example Dockerfile and Sources
Now that our automated scanner is in place, we can test it by pushing a Docker container, and check if it scans.
To illustrate the images scanning we will build an example Node.JS application based on the official “hello world” example described in their website.
Go to your Cloud9 Workspace and download and uncompress example container files
wget https://github.com/sysdiglabs/hello-world-node-vulnerable/releases/download/v1.0/hello-world-node-vulnerable.zip

unzip hello-world-node-vulnerable.zip

cd hello-world-node-vulnerable/
And build and push the image to ECR
export IMAGE=$AWS_ACCOUNT.dkr.ecr.$REGION.amazonaws.com/$ECR_NAME

docker build . -t $IMAGE

docker push $IMAGE
As soon as the image has been pushed to the registry, a new Amazon CodeBuild pipeline will be automatically created that executes an image scan using the integrated Sysdig Inline Scanner.
If you wish, you can check the CodeBuild pipeline status by visiting: Developer Tools > CodeBuild

If you wish, you can drill down to tail the logs as the scan proceeds
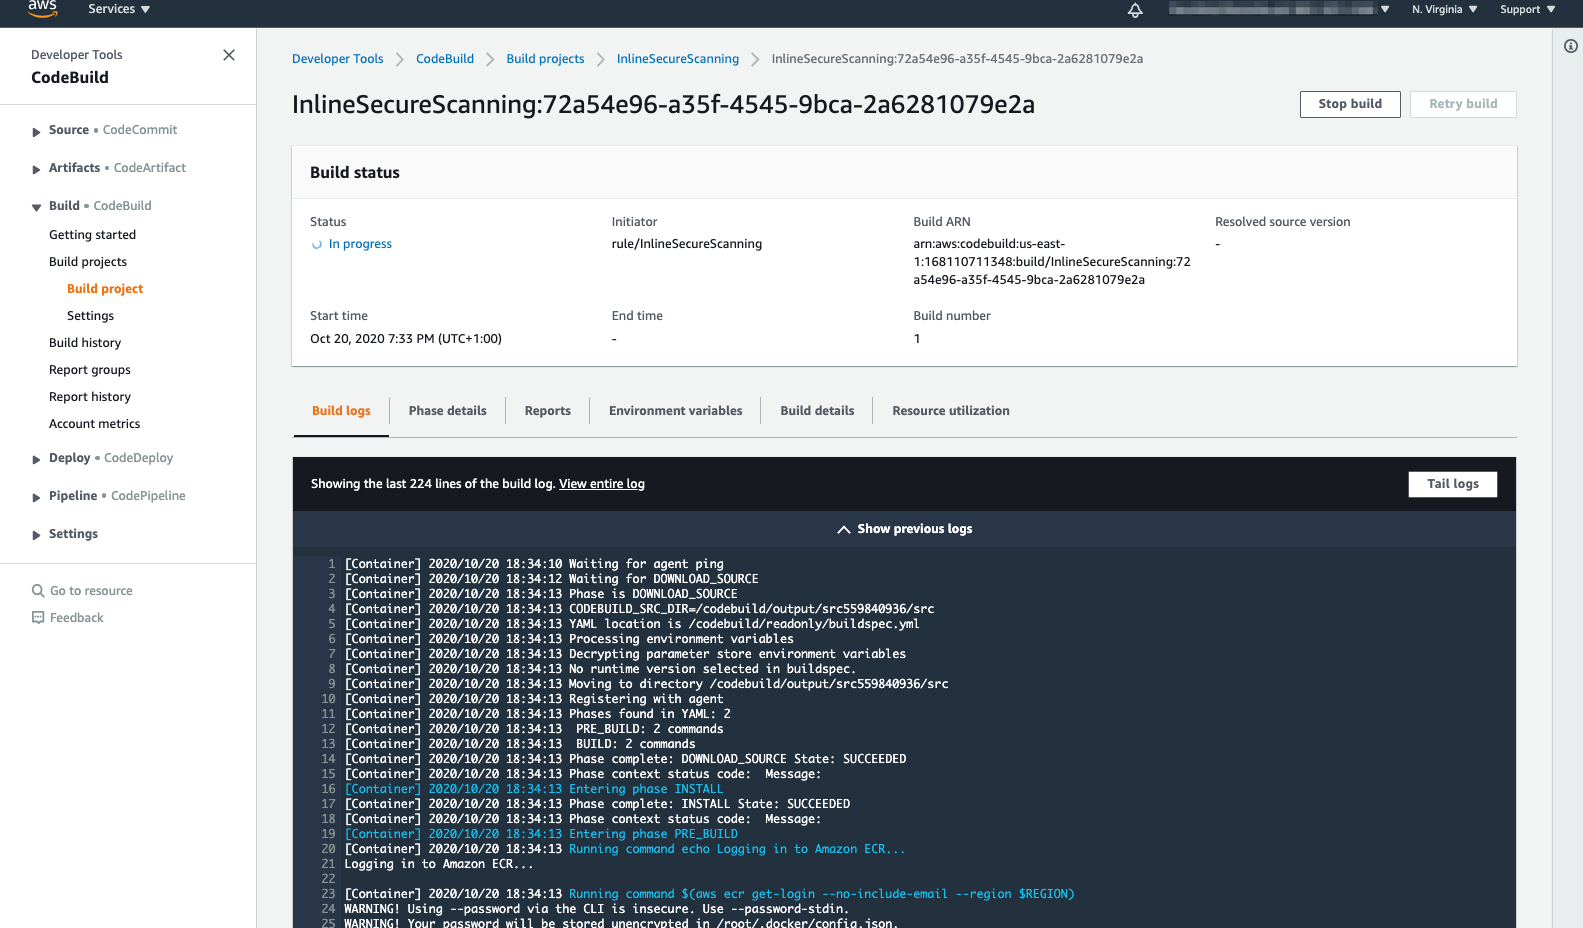
Once complete the scan will show the status ‘Failed’. 
Important This may mean the image has failed the scan, and not that the image scan process itself has failed. Check the CodeBuild pipeline logs to verify.
Optional: Further Information
You can see a complete log of the scan process by clicking ECS Scan log. This shows
layers of the image getting pulled and flattened (lines 24-199)
analysis phase, the metadata getting sent to (lines 201-204)
metadata getting posted to Sysdig Backend (line 206)
- backend analyses the metadata between lines 206 & 207
results of the scan are returned from the Sysdig Backend (lines 207-1979)
inline scanner script returns exit code 1 (line 1985)
See Scan Results on Sysdig Secure Dashboard
To see the scan results on Sysdig Secure Dashboard,
- Log into the Sysdig Secure UI, and browse to ‘Image Scanning > Scan Results’.
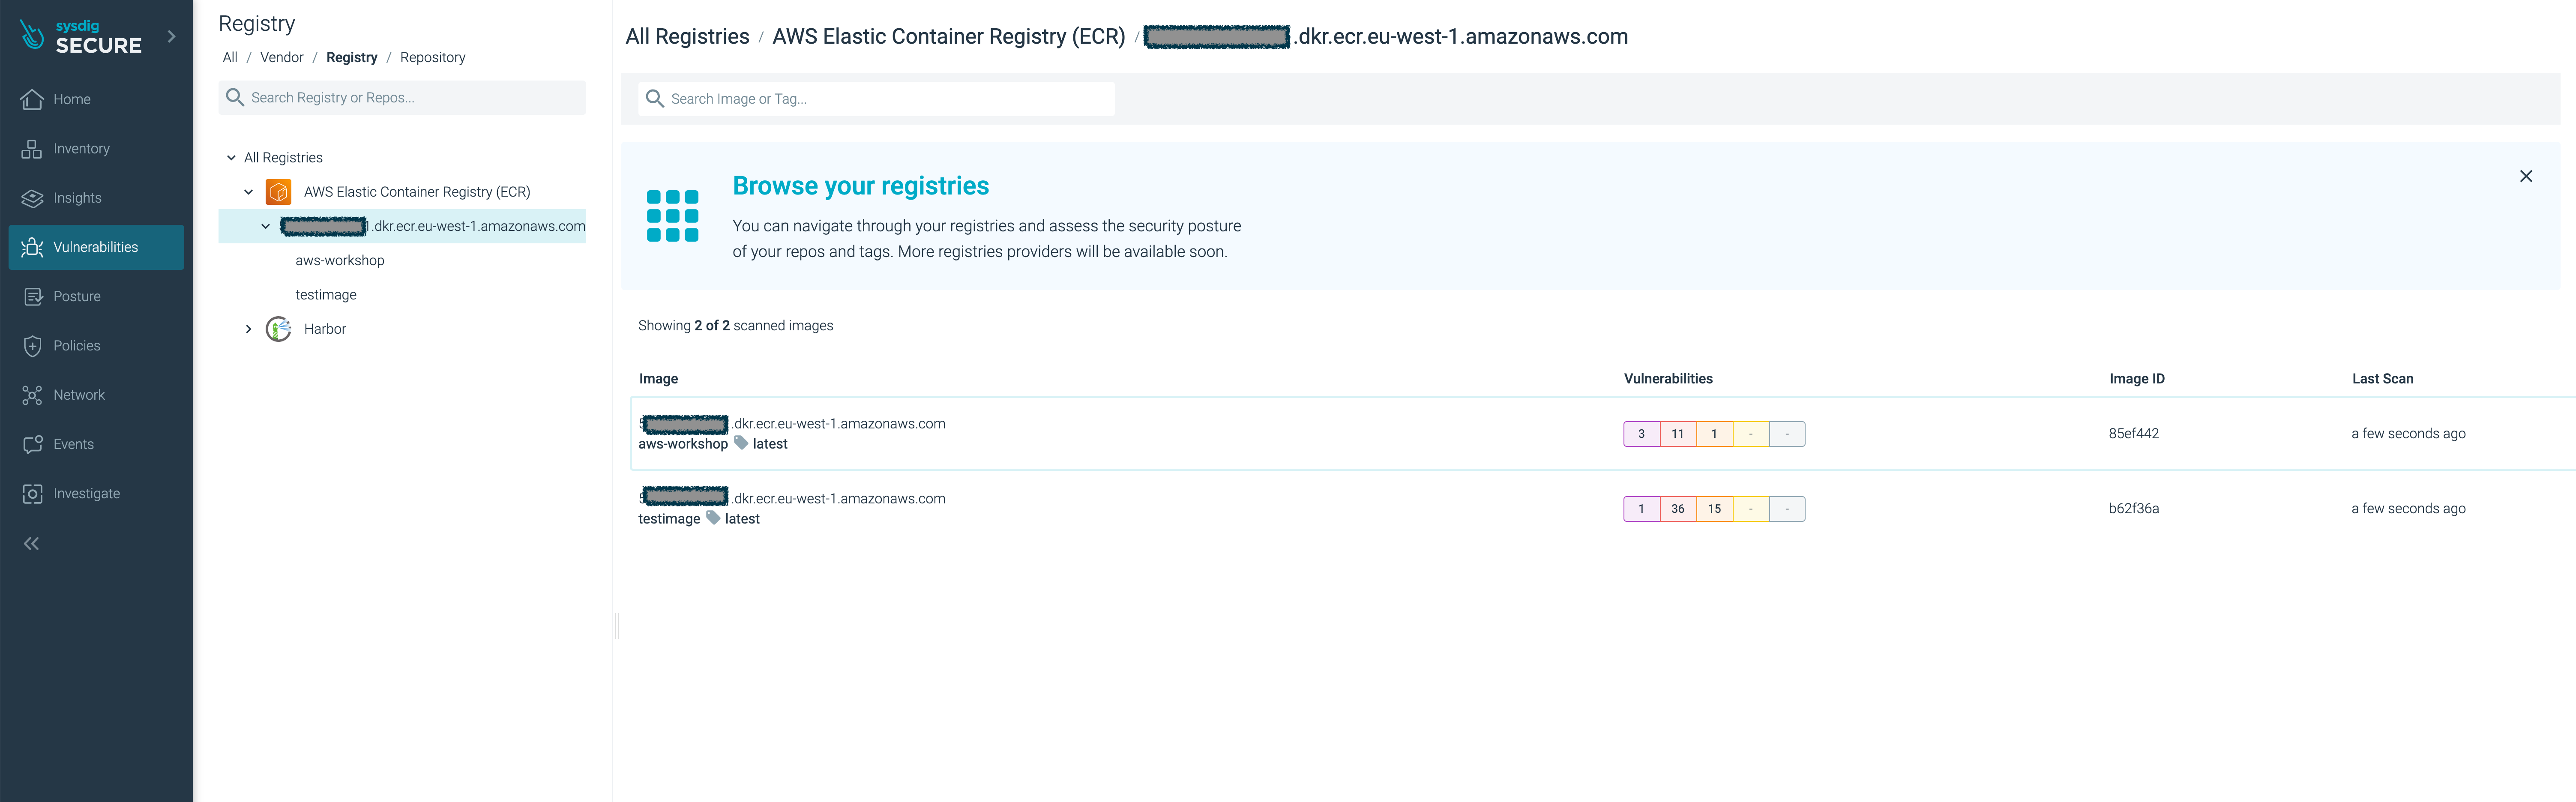
Click your new
aws-workshopimage.You’ll see the image have several major vulnerabilities.
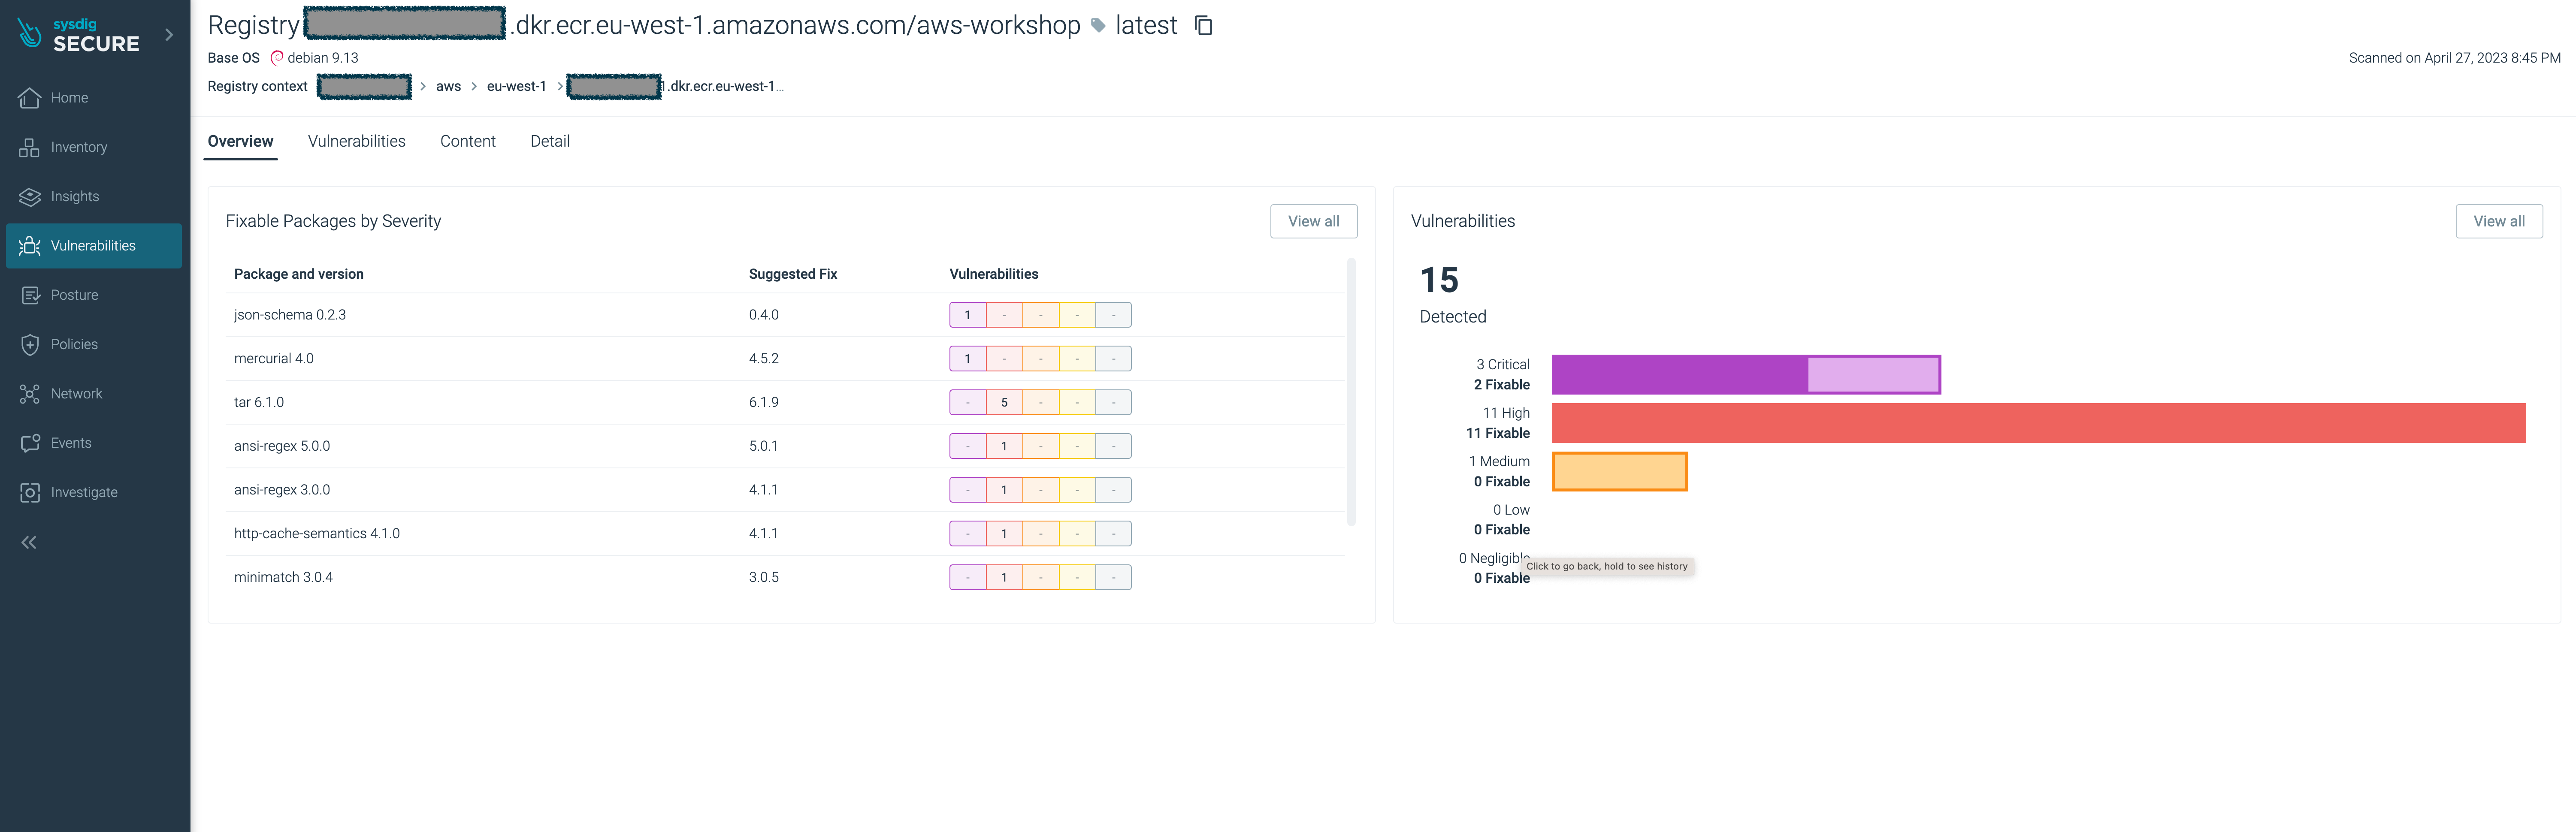
With Sysdig Secure you have full visibility of the security and compliance posture across your entire estate, in a single pane of glass, and as a central location for all security profiles and policies.